DIY for Kids: How to Build a Super Tall Straw Tower
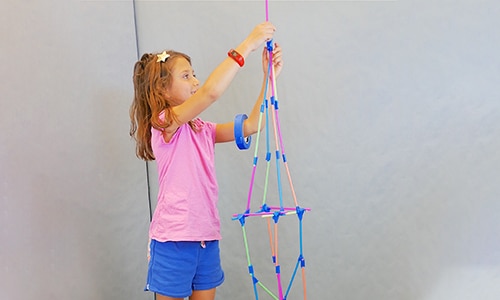
Suggested Ages: 6+ *You'll need a buddy for this challenge
Nothing’s as much fun as building something as tall as you can make it, from pillow forts to stacks of blocks to skyscraping towers. This DIY challenge lets you supersize your dreams by building the tallest tower you can out of just a few simple materials.
This is no ordinary DIY for kids project: It’s a step toward becoming an innovator
Every Galileo Design-It-Yourself challenge teaches the same techniques that professional designers, engineers and artists use in their work. With skills like these, we believe you can change the world.
All innovators need these→ keep an eye out!
-

KNOWLEDGE: Facts, skills or context to inform your project
-

MINDSET: The right frame of mind to innovate
-

PROCESS: Steps to guide you along the path to your goal
The Design-It-Yourself Challenge
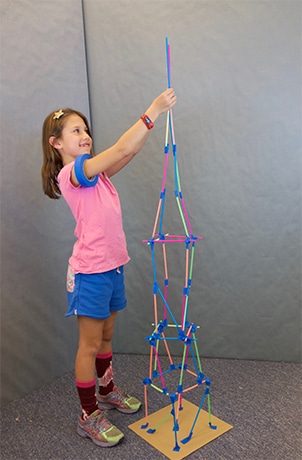
- Is taller than the shortest kid building it.
- Stays standing when the testing weight is attached.
What You Need
- 1 small binder clip
- 2 metal washers, coins or other objects to use as weights
- 1 roll of masking tape
- Lots of non-bendy straws (preferably compostable)
- 1 piece of 12″ x 12″ corrugated cardboard (the kind of cardboard you find on a box; size doesn’t have to be exact)
How to Get Ready
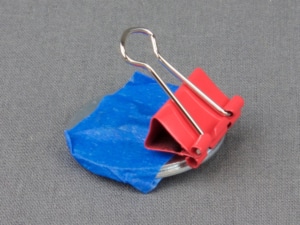
1. Make a testing weight
by taping your two washers or other weights to a binder clip for a pretty simple challenge. Adjust the difficulty level by adding more weight.
2. Boost your knowledge of straw-building techniques:
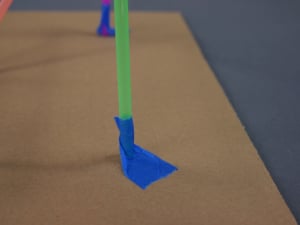
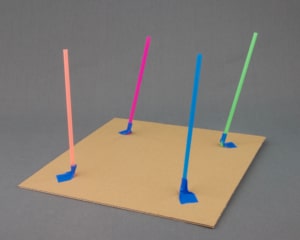
Uprights: Tape the straw to the cardboard so half the tape is pressed flat against the cardboard and the other half is pinched around the straw.
Wraparounds: When connecting two straws together, wrap the tape completely around one of the straws and stick the tape to itself.
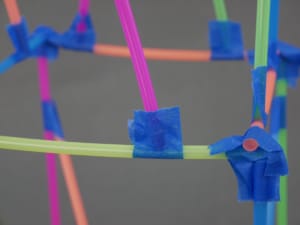
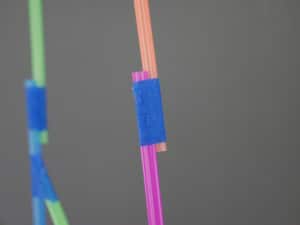
Overlap and wrap: To make a long beam, overlap two straws by about 1″. Then tightly wrap a piece of tape around the overlapped area.
How to Build Your Tower
Step 1:
Get your uprights ready by placing half a piece of tape on a straw, leaving the other half hanging off.
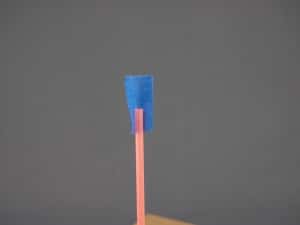
Step 2:
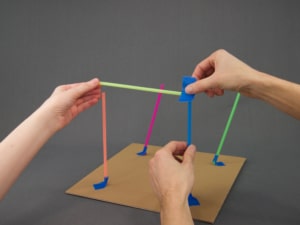
Start building using the uprights technique (see above) to secure straws to your cardboard base. Start with as many as you like—probably at least four, or more for extra stability.
Process Pro Tip
Creating a super tall tower is a big job that’s tough to do alone. Switching roles helps spread the work around, letting everyone come up with ideas and do some building.
Step 3:
Share the work by taking turns with two important jobs: architect and builder. The architect can decide where to put the next straw, then hold it in place as a builder attaches it. After each straw is attached, switch roles!
Mindset Challenge
It’s natural to think your approach is best—but remember that your fellow builders have awesome ideas and skills, too. If you can be collaborative by listening to different approaches and building off your buddy’s ideas, your final project will reflect the best everyone has to offer.
Step 4:
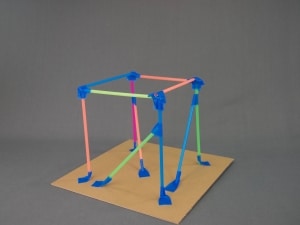
Add crossbeams between your uprights. These horizontal supports will help stabilize the upright straws, building a strong foundation for a super-tall tower!
Step 5:
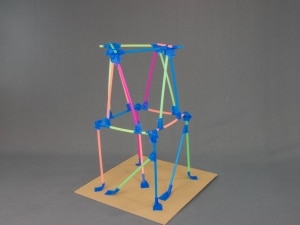
Build your tower taller—as high as two straw lengths.
Step 6:
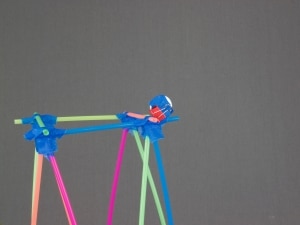
Test your tower using your testing weight. Clip it to the top in at least two places. If your tower stays standing, build taller! If it doesn’t, build a stronger base before adding more height.
Step 7:
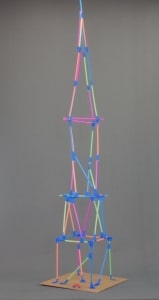
Keep building with an eye on stability. If your structure buckles when you put weight on it, that’s probably because rectangular shapes tend to collapse under force. Add triangular supports, or trusses, throughout your tower to keep it upright and strong.
Knowledge Alert
Unlike rectangles, which hinge at the corners and can flatten into parallelograms when force is applied, triangles have rigid corners that hold their shape under weight, making them the strongest shape there is. Triangle trusses are commonly used in architecture and structural engineering to support the weight of bridges and buildings.
Step 8:
Keep building and testing, sharing architect and builder roles and testing each time your tower gets one straw length taller. Add a spire near the top for some quick extra height.
Step 9:
Ask yourself these questions as you build
- What idea does your partner have for attaching the next straw? Where do you think it should go?
- Should the next straw make your tower taller or stronger? How might you add a straw to meet that goal?
- Where is your tower the weakest? How can you add the next straw to make that part stronger?
- Which parts of your tower are working the best? How could you apply that approach to other parts of your tower?
Step 10:
Success! Once your tower is taller than the shortest kid on your team and still stands up to your testing weight, you’ve completed your DIY challenge.
Innovate On!
- Can you build your tower taller than the next shortest kid on your team? Invite an even taller buddy to join you—can you build it bigger than them?
- Bump up the weight! Does your tower still stand strong? Add reinforcements and see how much weight your structure can support.
Galileo Learning ignites the innovator in every kid through summer camps in the California Bay Area, Southern California and Chicago.
Hungry for more? Check out other Galileo DIY for kids challenges:


 Design a New Deep-Sea Fish
  DIY Projects for Kids: Light-Up Cards to Make Spirits Bright
