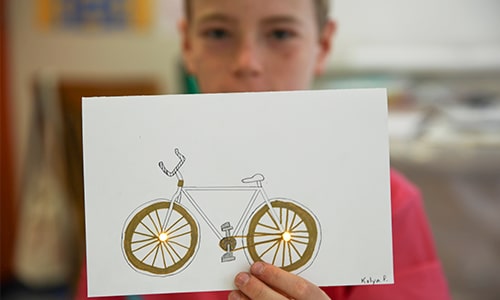
Here’s a bright idea: Hone your drawing and circuitry skills with a DIY project that’s also an awesome complement to any gift! This illuminating challenge takes you step by step through designing your own brilliant greeting card and wiring it with LED lights to make something that’s sure to delight its recipients.

Note: Once it’s wired up, this card can be tricky to send through the mail. We recommend hand delivering it.

Suggested Ages: 9+  

This is no ordinary DIY project for kids: It’s a step toward becoming an innovator

Every Galileo Design-It-Yourself challenge teaches the same techniques that professional designers, engineers and artists use in their work. With skills like these, we believe you can change the world.

All innovators need these→ keep an eye out!

  • Knowledge

    KNOWLEDGE: Facts, skills or context to inform your project

  • Mindset

    MINDSET: The right frame of mind to innovate

  • Process

    PROCESS: Steps to guide you along the path to your goal

The Design-It-Yourself Challenge

Create a dazzling greeting card with light-up features you wire yourself!

What You Need

  • 1 piece of 8 1/2 x 11 cardstock
  • Markers or colored pencils
  • Scissors
  • 1 small binder clip
  • Copper tape*
  • 1 3 volt coin-cell battery*
  • LEDs. Pick one of these colors: red, green, orange or yellow**
  • Conductive thread*
  • Clear tape

* You can find all of these materials at sparkfun.com.
**We suggest picking either red, green, orange or yellow LEDs because blue and white LEDs commonly have a forward voltage of more than 3V which requires a higher voltage battery. Also, red, green, orange or yellow should work together, but combining different colors sometimes does not. We suggest starting with one color for guaranteed success!

How to Make Your Card

Step 1.

Create your card by folding your piece of cardstock in half.

Step 2.

Decide on your card’s cover design. To get started, think of who the card is for or what the occasion is. For example is it for a friend, teacher, or grandparent? Is it for a birthday, holiday or just to say “hi”? Having the audience and occasion in mind will help you decide on an illustration to match. Next, think about what element or elements of your illustration you want to light up. Keep in mind that each light has to be wired individually, so you may want to plan on just one or two elements to start.

Mindset

Mindset Challenge

Deciding what to draw is one thing, but figuring out what you want to illuminate requires some real imagination. Be visionary as you think through your card design, deciding what light placement will make the most impact. If you’re drawing a bike, will it have a glowing headlight or a light in the center of each wheel? Will your dragon breathe illuminated fire or have eyes that glow? Giving careful thought to these questions before you start your project will ensure you have a truly brilliant finished card.

Step 3.

Illustrate your design using markers or colored pencils, making sure everything is the way you envisioned it before you add the lights. If it helps, you can leave a small circle (about the size of a hole punch) where the light(s) will go.

How to Illuminate Your Card

Step 1.

Make a negative battery plate. Measure a piece of copper tape halfway along the edge of the back of your card’s cover (on the opposite side of the design). Cut the tape, peel off the backing and stick it down.

Make a negative battery plate
Add a battery

Step 2.

Add a battery. Place your coin-cell battery negative side down so that the negative side is touching your strip of copper tape. Draw a ( – ) sign on the tape side to remind you that this is the negative plate.

Step 3.

Make a positive battery plate. Measure another piece of copper tape from the other side of your card, making sure it overlaps your first piece by at least an inch. Cut the tape, peel off the backing and stick it down, shopping short of the battery.

Make a positive battery plate
Connect the positive battery plate to your battery

Step 4.

Connect the positive battery plate to your battery. Fold the leftover edge of your tape strip over on itself (sticky side to sticky side) so the end is conductive on both sides. When laid flat, the folded end of the tape should touch the topside of the battery (the positive side).

Step 5.

Mark the plate and secure your battery. Draw a ( + ) sign next to this second piece of tape to remind you that this is the positive plate. Use a small binder clip to keep the battery sandwiched between the two pieces of copper tape.

Mark the plate and secure your battery
Test your plates

Step 6.

Test your plates by taking an LED, spreading the leads out, and touching each one to the correct plate (positive to positive, negative to negative). It should light up, just as if it were connected directly to the battery. If it doesn’t, check the following:

  • Make sure both sides of the battery are touching the shiny, conductive side of the copper tape.
  • Make sure the negative and positive tape strips aren’t touching each other.
  • Notice that the wire leads on the LED are two different lengths. Make sure that the positive (long) lead is touching the positive strip of copper tape and that the negative (short) lead is touching the negative strip. (Neither lead should touch the battery.)
Process

Process Pro-Tip

Testing your plates (the positive and negative copper strips) and redesigning them as needed to make your LED light up is an essential part of this challenge. You can’t make an illuminated card without something that illuminates, so take the time you need to get this step right before moving on!

Insert An LED

Step 7.

Punch a hole for your LED. Make a small hole through the front cover of your card where you plan to put your first LED. To make the hole, use an awl (if you have one), closed scissors or even a sharpened pencil being careful not to make the hole too big.

Punch a hole for your LED
Insert the LED

Step 8.

Insert the LED. Choose an LED in the color you want and insert it into the hole. Then open your card to the inside cover and spread out the leads to hold the LED in place.


Connect the LED to the Battery Plate

Step 9.

Connect the LED leads to your plates. Measure out two pieces of conductive thread, one piece will be used as the “positive” thread for connecting the positive plate to the positive LED lead, and the other piece will be the “negative” thread for connecting the negative plate to the negative LED lead. Take your positive thread and twist the thread around the positive lead a few times to make sure there is a good connection. Then tape the thread to the lead. Repeat that step with the negative thread and the negative lead. Now, it’s time to test before securing your threads to the card. Hold each thread to its corresponding battery plate—making sure the threads don’t touch each other—and test to make sure your light turns on. Once you’ve confirmed your LED lights up, use scotch tape to secure the threads to each plate. Completely cover each thread separately with tape if they are criss-crossed or adjoining so they don’t touch each other.

Connect the LED leads to your plates

Step 10.

Add any additional lights. Repeat steps 7 – 9 for any additional light-up elements on your card.

Gift your card

Step 11.

Gift your card! Once your card is beautifully illustrated and brightly illuminated, finish it off with a note to a special someone and deliver your dazzling creation!

Innovate On!

Hungry for more? Check out other Galileo DIY for kids challenges.

Galileo Learning ignites the innovator in every kid through summer camps in California, Chicago and Denver.