3 Simple Materials Anyone Can Use To Make Great Costumes
Homemade costumes can be big fun, but they’re never going to assemble themselves. So once you’ve got your awesome costume idea, how exactly do you take it from vision to reality?
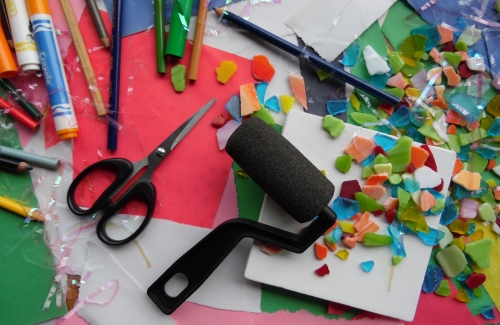
Fortunately, even if you don’t have a crafty bone in your body, there are a few magical materials that can bring any costume idea to life—and you don’t have to be a DIY expert to use them. Read on for some tips from the Galileo team on the supplies we like best and techniques for transforming them into seriously impressive costumes.
MATERIAL #1: CORRUGATED CARDBOARD
Why we love it:
- It’s plentiful. Most of us have a few (or many) boxes lying around the house at any given time.
- It’s recycled and recyclable. It’s easy and earth-friendly to drop your cardboard costume in the recycling bin once you’ve worn it (unless it’s so awesome you want to wear it again).

How to shape cardboard for costumes:
Make straight-sided shapes.
For straight-line cuts, use the natural corrugations of your cardboard as guidelines for keeping your cuts straight (it’s also easier to cut between corrugations, as the cardboard is thinnest there). If you’re cutting a rectangle—even if you incorporate a corner of piece of your cardboard to do it—you’ll still need to cut at least one side across the corrugations. In that case, it’s easiest to orient your shape so you cut the longest sides along the corrugations and the shortest side(s) across them.

Make 3D shapes.
Make hats, crowns, robot arms, thick bracelets and more by bending your straight-sided shapes into round or straight-sided (rectangular, triangular, etc.) tubes. For bending, as with cutting, it’s always easiest along the corrugations. If your cardboard is too thick to fold cleanly, use a box cutter or sharp blade to score (cut just halfway through) a line along the corrugations before you fold it. Score and bend only at the corners of your straight-sided forms, or at more regular intervals to create forms with smoother curves.

Make more intricate 2D shapes.
For less-standard forms like a star-shaped sheriff’s badge or angel wings, first draw an outline of your desired shape on cardboard, then cut along the lines with a scissors. If this method is too challenging (or if you have lots of special shapes to cut), set up a cutting station:
- Use a cardboard box as your workbench, gluing two paint stirrers 1/4 inch apart on top of it.
- Run a box cutter or scissor edge between the paint stirrers to create a slit in the box.
- Place the cardboard you want to cut on top of the “bench,” positioning the first part you want to cut over the slit.
- Use a serrated steak knife like a saw to cut through the slit and along the line, using an up and down motion and rotating the cardboard as needed to keep the knife in the slit.
- Be sure to wear a glove for safety!

How to secure two pieces of cardboard together (or to you):
Create a strong hold by using the plus-sign taping technique. For example, you can connect a toilet paper roll to a piece of cardboard to make a handle for a shield. Simply tape in a longitudinal line to connect your cardboard pieces, then place additional pieces of tape across the first one to make plus-sign shapes. Run your fingers over the tape to hold it firm.

Attach a tube to a flat surface using the “banana peel method.” Cut slits into your tube and fold/flare the sides back to make tabs. Then hot glue the tabs to your flat surface.

Add straps so you can wear your costume creation. To make string straps, poke holes in your cardboard first, push your string through, tie it and tape over the ties to hold them in place. To make tape straps, tape two pieces of duct tape back to back, then attach them to your cardboard using the plus-sign technique.
Make your straps even stronger by reinforcing your plus-sign taping. Instead of placing the plus sign at the end of your strap, place it 3 – 4 inches from the end. Take the extra strap “tail” you now have hanging down and fold it back up over itself, then tape it again, making a U-fold on the strap that’s taped in two different layers. This technique distributes the weight of your costume and makes it more likely to hold, no matter how many times you wear it.
How to beautify it:
If you plan to paint your cardboard costume, create a clean look by folding duct tape over all the exposed edges to make an even border before you paint.
Paint your cardboard using tempera paint sticks, a fast-drying, no-mess, kid-friendly option for covering a lot of surface area with color. **Pro tip: If you’re using liquid paint rather than paint sticks, spray the back side of your cardboard lightly with water before painting the front to keep it from warping.
Create cool features using craft foam and pipe cleaners (more on both those materials below…) to add detail, dimension and texture to your costume.

MATERIAL #2: CRAFT FOAM
Why we love it:
- It’s a jack of all crafts. Inexpensive and incredibly versatile (see just a few ideas for what you can make with it below), this handy supply is available everywhere and adds extra awesome to every project.
- It comes in lots of varieties. Pick up single or multi-color packs, regular or sticky back, simple sheets or cool shapes—the possibilities are pretty endless. And since it’s already colorful, there’s no painting required.
- It’s easy to use. Delightfully pliable, craft foam is simple to cut, shape, staple and stick (especially the sticky back variety).
How to enhance it:
Layer your foam to create depth and detail. For example, you can make a realistic-looking eye using a piece of white foam as your base, then layering a circle of color over it for an iris and a black circle on top of that for a pupil.
Texture your foam by gluing small things (googly eyes, bottle caps, dried noodles, straws, etc.) to it and painting over them. For example, if you stick a row of googly eyes to your foam and cover the whole thing with silver paint, you’ll create rivets for your robot or suit of armor.
Carve into your foam with toothpicks, then paint over your etching with tempera paint sticks. The etched part will stay unpainted and give you some beautiful detail.
What you can make with it:
All kinds of accessories. Sandwich a pipe cleaner between two pieces of sticky back foam to make a bendable shape that’s good for headbands, wrist bands and antennae.
Amazing masks. Staple some elastic to the foam and enhance your mask using the techniques above.
Spikes. Create sharp-looking but harmless spikes for your dinosaur costume by rolling your foam into conical shapes. Attach them to cardboard using the “banana-peel” method above.
Finishing touches. Cut and layer foam shapes to enhance any costume with bird feathers, fish scales, superhero logos and more!

MATERIAL #3: PIPE CLEANERS
Why we love them:
- They come in lots of varieties. From tiny to jumbo, solid to striped, matte to glittery and bristly to super soft, there’s a pipe cleaner that’s perfect for every project.
- They’re easy to use. Considering how easy they are to cut, bend and mold, it’s no surprise that pipe cleaners have been a craft supply staple for generations.
How to shape them:
- Wrap them around a tube or pencil to make a coil.
- Accordion fold them to make a zigzag shape.
- Sandwich them between pieces of craft foam to make posable foam shapes.
- Braid two together to make them extra strong (and extra colorful!).

What you can make with them:
Furry ears. Line cardboard or craft foam triangles with fuzzy pipe cleaners.
Alien or robot antennae. Use metallic pipe cleaners.
Any accessory. Shape your own glasses, flower bouquets, wands or halos. Bead your pipe cleaners to make more extravagant necklaces and bracelets.
Spines or ridges. Stick the pipe cleaner ends into the corrugations along the edges of your cardboard (no glue or tape needed!), positioning them straight up to create rows of spines for a porcupine or bent into triangles (with both ends of the pipe cleaner stuck into the corrugations) for the ridges on top of a crown.
Furry or grassy texture. Use the side of a pipe cleaner as a paintbrush or stamp to add a textured look to any costume.

Now that you’ve got the goods on DIY costuming, the sky’s the limit. Good luck and, most importantly, have fun creating!
The last step of the Innovator’s Process is to share. We’d love to see a photo of your creation in the Camp Galileo Anywhere Facebook group.

 11 Virtual Field Trips You Can Take From Home
 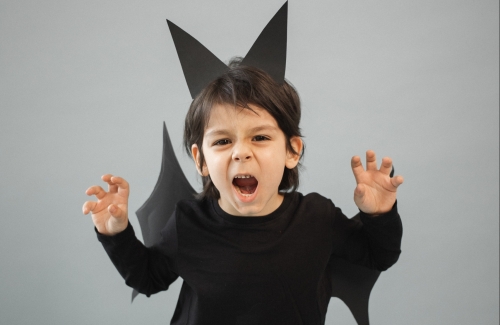 Proven Brainstorming Techniques: Great for Costume Ideas (and More!)