Suggested Ages: 9+
Use everyday materials to design a crank-operated cardboard automaton that can perform an array of complex motions, from bobbing up and down to spinning in circles! Inspired by an activity from the Exploratorium Museum in San Francisco, this playful DIY project blends mechanics and storytelling for a one-of-a-kind masterpiece.
This is no ordinary DIY for kids project: It’s a step toward becoming an innovator
Every Galileo Design-It-Yourself challenge teaches the same techniques that professional designers, engineers and artists use in their work. With skills like these, we believe you can change the world.
All innovators need these→ keep an eye out!
-

KNOWLEDGE: Facts, skills or context to inform your project
-

MINDSET: The right frame of mind to innovate
-

PROCESS: Steps to guide you along the path to your goal
THE DESIGN-IT-YOURSELF CHALLENGE
Build a cardboard automaton that…
- Includes at least two moving characters.
- Operates smoothly.
- Has a cool theme!
KNOWLEDGE ALERT
An automaton is a non-electric moving machine designed to follow a predetermined sequence of actions. Dating back to ancient times, automata attempted to imitate life through mechanical means. Some are functional (like watches and clocks), while others are purely decorative, making them a fascinating blend of engineering and art.

WHAT YOU NEED
- Corrugated cardboard box, at least 12″L x 8″D x 10″H*
- Masking tape
- Scissors
- Pencil
- Ruler
- Pencil sharpener
- 1 1/4″-thick dowel that’s about 4″ longer than your box
- 2 additional 1/4″ dowel pieces in approximately 4″ and 6″ lengths (6″ piece is optional)
- 2 – 4 corks**
- 1 craft stick
- Hot glue gun and glue sticks
- 2 or more 3 oz. paper cups
- 1 thin drinking straw
- 2 or more bamboo skewers
- Craft foam, construction paper, pipe cleaners and other decorative materials
- 1 rubber band, approximately 1⁄8″ x 7″ (optional)
* Box size doesn’t have to be exact, but should be at least 8″ deep so your rotating mechanism doesn’t bump the inside of it.
** We like corks (which you can sometimes get for free from restaurants) because they can be pierced with a skewer and provide some weight. You can also use thick packaging foam or layers of craft foam along with a metal washer for weight.

HOW TO BUILD YOUR CARDBOARD AUTOMATON
Step 1.
Prep the box. Close the flaps on the bottom of the box and secure them with masking tape. Use the scissors (and some muscle!) to cut off the four box flaps on the top. Set the box down lengthwise, with the opening facing front.


Step 2.
Find the center of each side of the box. Using your ruler and pencil, draw lines from opposing corners to make an X on one side. Use the sharpened pencil to poke a hole through the middle of the X. Repeat on the other side.
Step 3.
Install the crankshaft. Sharpen one end of your dowel with a pencil sharpener and insert it through both holes in the box. Push a cork onto the sharpened end of the dowel.


Step 4.
Hold the crankshaft in place. Cut an L-shaped piece of cardboard from your scraps, then tape the bottom edge of the L to the non-cork end of the dowel, like this:
Step 5.
Make the crank handle. Snap the craft stick in half and hot glue its two pieces onto the end of the crankshaft at a right angle. Sandwich your 4″ piece of dowel between the craft stick pieces in an L shape, gluing them into place. This should give you a sturdy crank.

KNOWLEDGE ALERT
Cams are parts of machines that transform a circular spinning motion into a linear up-down or side-to-side motion. The shape, size, position and number of cams create different kinds of motion. Cam followers are the objects that are moved by the cam.
(In the drawings below Step 8, the cam followers are the horizontal circles that rest on top of the cams.)

Step 6.
Create the cam-follower support. Glue a small paper cup upside down onto the top of the box where you want your first moving element to be. Use a sharpened pencil to pierce a hole through the cup and through the box directly below it.
Step 7.
Secure your support. Cut a straw in half and insert it through both holes, leaving just a little sticking out at the top (through the cup) and the bottom (through the box). Tape it in place to prevent it from sliding around. This will help reduce friction and ensure that your cam follower doesn’t wobble.

MINDSET CHALLENGE
Your automaton does not yet exist—it’s up to you to be visionary and create a design for it. What types of characters or objects will be in your scene? How will those things move? Your vision will need to be both mechanical (how the elements move) and visual (how the elements look). Once you come up with a clear vision for the automaton scene you want to create, you can make a plan and pick the right cam shape below to bring it to life.

Step 8.
Choose a cam shape. The shape and size of your cams will affect how your automaton elements will move. Look closely at the illustrations and photos of different cams below and try to visualize how each design will work. Pick a cam shape that you think will match the motion you envision.
Step 9.
Make your first cam. (While you can pick any shape you like, we’ll walk you through a simple design for your first.) Cut a cardboard circle from your scraps that’s 3″ to 4″ in diameter. Poke a hole in it with your pencil. The position of the hole affects how much the cam follower will move up and down. The farther it is from the center, the greater the up-down movement.
There are tons of cam-shape possibilities, so experiment with a few options before settling on one. Try off-center cams, snail-shaped cams or even more than one cam with a single cam follower!

Step 10.
Prepare your cam for installation. Cut a slit from the outside of the cam to the hole. Hot glue an approximately 1.5″ x 1.5″ L-shaped piece of cardboard upright onto the cam on the other side of the hole. This will be used to prevent the cam from wobbling.
Step 11.
Slip the cam onto the crankshaft through the slit on the cam and into the hole.


Step 12.
Position the cam under the cam follower support (cup and straw) and tape the free side of the cardboard L onto the crankshaft.
Step 13.
Make the cam follower. Cut another 3″ to 4″ circle and glue a cork to the center. Depending on the size of your box, you may need to cut the cork in half with a kitchen knife or by carefully working at it with scissors. Poke a hole into the top side of the cork with a skewer.


Step 14.
Install your cam follower. Hold the cam follower above the cam and below your cam-follower support. Drop a skewer into the straw that runs through your support. Fit the skewer into the hole you made in the cam follower’s cork.
Step 15.
Test it out! Give the handle a crank and see how your automaton works so far. Remember, your goal is to have motions that work smoothly and reliably.

PROCESS PROTIP
There are a lot of moving parts in this project, and it’s to be expected that they might not move smoothly at first. Your cam could get stuck or the cam follower support might be crooked. Take the time to slowly rotate the crankshaft and look closely at your design, evaluating if and why your cams aren’t working just right. Redesigning at this important stage of the process will ensure a successful automaton when you’re done!

Step 16.
Redesign (and redesign some more). If everything’s not cranking smoothly right away, don’t despair! You can easily reposition the cam by un-taping it from the crankshaft and moving it. If you need to remake your cam, just slip it off and try again. Think back to the vision you created for your automaton scene and how you want the characters to move and interact. If you’re having trouble evaluating the quality of the motion, attach a small piece of tape to the top of the skewer and watch how the flag moves when you turn the crank. Now is the time to make sure that parts moves as you’d imagined them.
Step 17.
Make more motions. Repeat steps 6 to 15 to create more motions with different cams to match your vision.


Step 18.
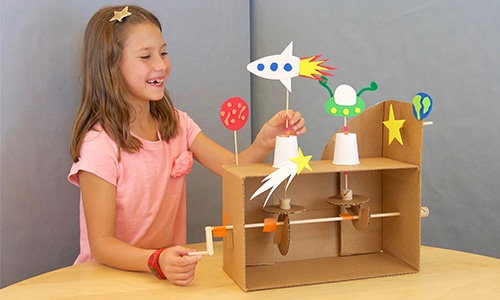
Add your characters! We decided on a space theme, with a spaceship and UFO made from craft foam. You can use layers of foam to make certain features (like our rocket flames and UFO lights) pop.
Step 19.
Make your scene your own (and make it awesome). Add more elements that help tell your story. Try finding things that jiggle and wiggle with cam-follower motion, like pipe cleaners or folded paper. Try covering the cardboard surfaces with colorful construction paper to bring more vibrancy to your scene. Get creative with other decorative materials and add as many embellishments as you like. It’s yours to customize!

INNOVATE ON!
Want even more motion? Create another DIY moving element! We added a spinning star with a rubber band pulley. Here’s how you can do something similar:
Step 1.
Glue a folded piece of cardboard around the back corner of your box on the side opposite the crank. Attaching the cardboard around a corner (to both the side and back of the box) creates a sturdy surface for a pulley.
Step 2.
Glue a piece of cork and a 1″ x 2″ piece of cardboard onto the back of the cardboard extension, on the side of your automaton. The cork should be about 9″ from the crankshaft below.
Step 3.
Use a sharpened pencil to poke two holes like the ones in the photo below. Push your 6″ piece of dowel through both of them.
Step 4.
Temporarily remove one end of the dowel piece so you can loop your 7″ rubber band around the crankshaft at the bottom and the short dowel at the top. Turn the crank. The short dowel should turn with the crankshaft. If the rubber band is too loose, reattach the cork/cardboard piece a little higher (or use a smaller rubber band). If it’s too tight, reattach it lower (or use a larger band).
Step 5.
Attach your moving element to the inside end of the short dowel and watch it spin!
Hungry for more? Check out other Galileo DIY for kids challenges.
Galileo Learning ignites the innovator in every kid! We have summer camps in Berkeley all the way to Chicago. Be sure to check our camp finder to find the location closest to you.