Coloring Techniques for Artists of All Ages
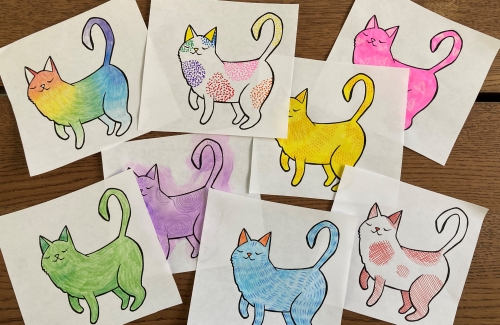
Whether you’re painting a masterpiece, writing a speech, or designing a bridge, skills and techniques are an essential part of any innovator’s knowledge. Indeed, some of the most influential artists in history, from Picasso’s contributions to cubism to Pollock’s expressionist splashes, made their mark through creative use of the tools of their trades.
You don’t have to be a big-name artist to get in on the action. Try your hand at these coloring techniques to level up your next artistic endeavor.
Technique #1: Apply Color Theory
Whether you’re looking for colors that work together in harmony or are on the hunt for a hue that will pop and provide contrast, look no further than the color wheel.
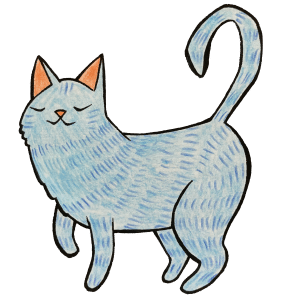
The example below uses pencils in two types of blue, which would be near each other on the color wheel, to create depth and direction in the cat’s fur. A bright orange, located across the color wheel from the blue family, provides a complementary color accent for the cat’s nose and ears.
Technique #2: Shading
Each color—also known as a hue—has a whole family of shades (darker versions of the color) and tints (lighter versions).
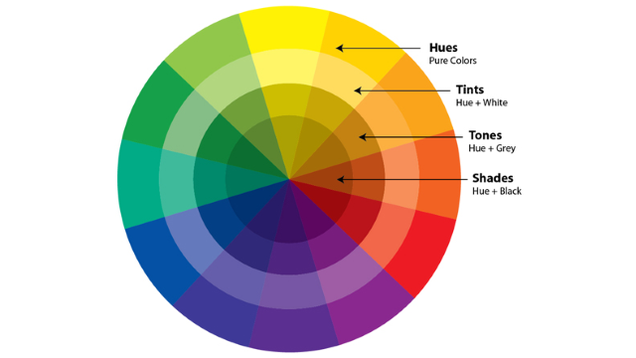
You can use tints and shades to add depth to your drawings and paintings. Think about where the light might create bright spots or shadows on your subject. Use darker versions of the color to shade in the spaces where shadows would be, and use tints where you would expect highlights.
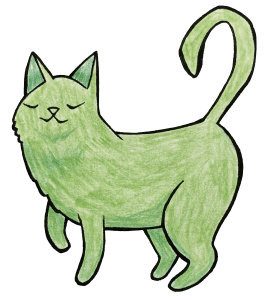
In this example, the artist colored the entire cat with a bright green colored pencil, then went over the shadowy places like the cat’s tummy, chest, right legs, chin, and ears with a darker green.
Technique #3: Hatching and Crosshatching
Hatching is an artistic technique that creates shading effects with closely spaced parallel lines. Cross-hatching is a similar technique that uses another layer of lines over the first, this time in the opposite direction.

In this example, the artist used both hatching and cross-hatching to shade the cat.
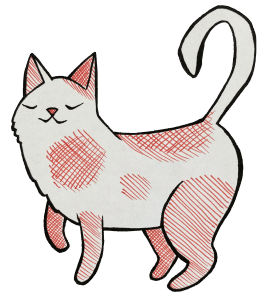
With a fine-tipped marker, the artist created splotches of diagonal lines in one direction. To create darker areas, the artist then drew patches of lines in the opposite direction. Notice how the resulting cross-hatched areas suggest shadow, as with the cat’s right legs and inner ear, or darker colors in the fur.
Technique #4: Frottage
Frottage is an artistic technique that uses rubbing to create texture. Here’s how the artist Max Ernst used frottage rubbings in his work and how you can apply the technique in your next project.
In this example, the artist first put down a base layer by using a yellow marker to color in the entire cat. After the marker had completely dried, she laid her paper over a woven placemat. She then used an orange crayon to rub orange stripes, capturing the placemat’s bumpy texture.
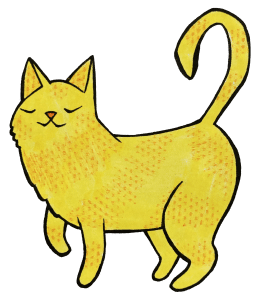
The next time you try frottage, or texture rubbing, try experimenting with different tools like crayons, markers, and pencils. What kinds of effects do you create with the different mediums? What happens if you press harder on the tool, or more lightly?
Technique #5: Wax Resist
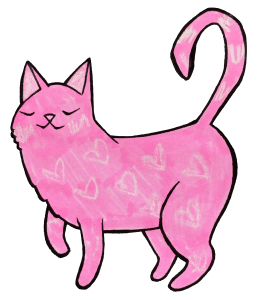
Wax resist is a fun technique that allows the artist to create marks in wax that repel and peek through a water-based medium.
To start, choose your materials. You’ll need something waxy, like a crayon, and something wet, like markers or watercolor paints. Press hard with your crayon to apply as much wax as you can to the blank paper. When you feel satisfied by your wax markings, apply a layer of the water-based medium over it.
In this example, the artist used a white crayon to draw hearts and squiggles, then went over the markings with a pink marker. The crayon marks transformed from totally invisible to front-and-center as the wax resisted the water-based marker.
Technique #6: Pointillism
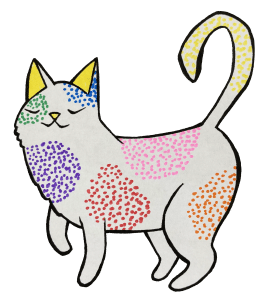
If you’d like to add some color, why not do it with dots? Pointillism is an artistic technique in which color is applied with tiny dots or marks that form an image at a distance.
Georges Seurat famously employed this technique in his painting, “A Sunday Afternoon on the Island of La Grande Jatte,” which is made up of millions of individual dots.

You don’t have to be a painting pro to get your point across. Just pick up your favorite coloring tool—markers or paints work well—and dot it up. Use the tip of your chosen tool to apply color, noticing the effects you create when dots are very close together or further apart. What happens if you use dots of two or more colors in the same space?
Technique #7: Applying a Wash
A wash is an artistic technique that creates a semi-transparent layer of color. Washes can be used as backgrounds, base layers, and more. The dappled effect of a wash makes it great for building up layers of color and interesting textures.
Watercolor paints are perhaps the most common medium to apply a wash, but they’re definitely not the only option. If you don’t have watercolors handy, grab a paper towel, a cup of water, and a washable marker. Fold or crumple the paper towel, then use the marker to apply color to a small part of the dry towel. Lightly dip the colored portion of the towel in water, then use the towel to apply the diluted ink to your paper.
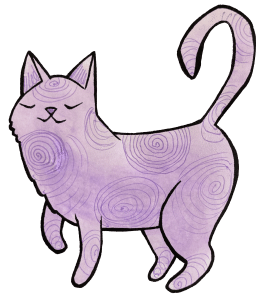
Technique #8: Color Blending
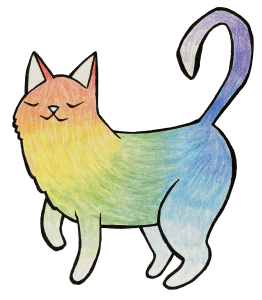
Have you ever wanted to transition one color smoothly into another? If so, ombre might be just the effect for you.
Ombre translated to “blended” in French. Aptly, this technique deals in blending one color into another. While this often means working from darker shades of a hue into lighter tints or vise versa, the effect can be achieved between hues of completely different color families.
Put Your Skills to the Test
Ready to apply your artistic know-how? Take The Great Galileo Creativity Challenge! From November 1 – November 22, 2021, artists of all ages can participate in an artistic extravaganza. Bring your wildest ideas out to play, and you could win a fabulous prize.

 11 Virtual Field Trips You Can Take From Home
  Keep Your Kids Engaged During Spring Break With These STEAM Projects
  Design a New Deep-Sea Fish