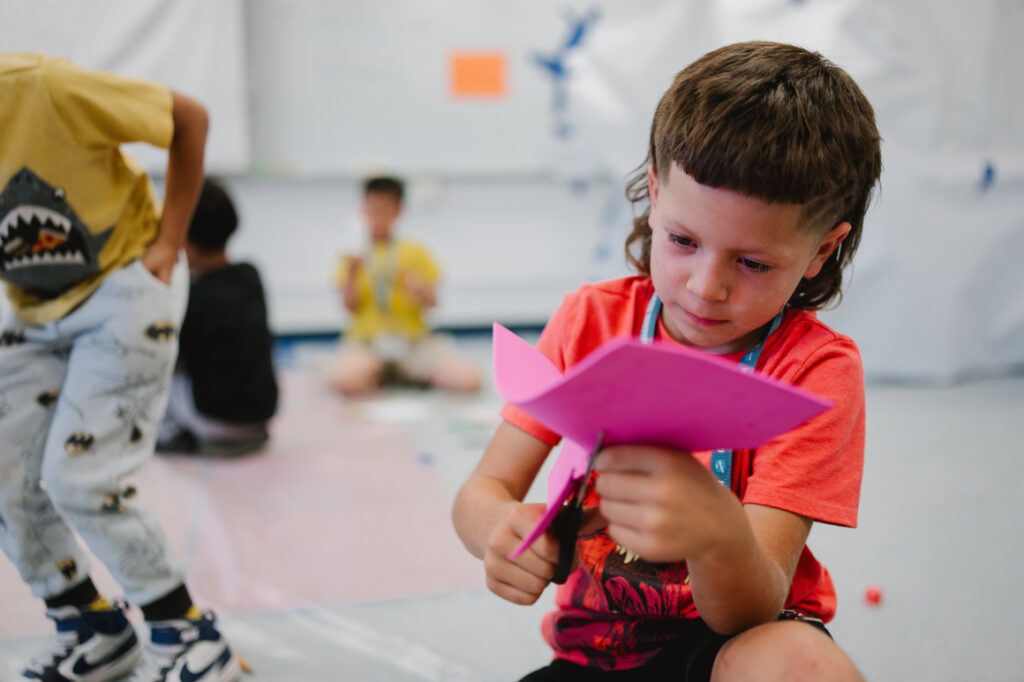
There’s a certain satisfaction that comes with making something from scratch. Getting to choose your own materials and learning a new process give handmade goods that special, sentimental touch. And when it comes to family-friendly craft projects, the paracord lanyard is the perfect choice for a fun DIY activity.
Lanyards are pieces of fabric, string or rope that are designed to hold something like a keychain. They can hold keys, a whistle, a name tag—you name it. They also are the perfect accessory for summer camp. Furthermore, a custom lanyard is relatively easy to make and fantastically fun to personalize, so regardless of age or ability, the whole family is certain to enjoy.
If you’re looking for an exciting, engaging activity that helps kids learn design skills while making something they can be proud of, then get your fabrics ready. In this guide, we’re linking you up with all the details and instructions about how to make a lanyard—from selecting materials to maintenance and care.
Getting Your Materials and Tools Ready
Noted above, a custom lanyard can be made from a variety of materials. Kids often use simple materials like paracord, ribbon, or plastic lace—perfect for playful, no-sew crafting. But if you want a polished, sewn version, fabric works great too.
For the sewing method, go ahead and assemble:
- Fabric – Any type of fabric will do, so long as it’s fairly strong and feels comfortable enough to wear against your skin. Grab a style you like and cut a piece three inches wide and 40 inches long. Feel free to adjust the length to fit your desired neck or wrist, but keep the width the same.
- Batting – Batting is a soft, fibrous material used to make furniture, cushions, quilts and other upholstered goods. You’ll need a piece three-quarters of an inch wide and half an inch shorter than your piece of fabric.
- Thread – You’ll be sewing this lanyard together, so pick a strong thread with a complementary color to match your fabric. Note: If you don’t want to use a needle or sewing machine for this project, we’ll be offering an easier, thread-free alternative that comes together quicker than the sewn version.
For the tying method:
- Paracord, plastic lacing, or strong ribbon – Cut to your desired length (typically 36–40 inches). These materials are great for camp-style, knot-based lanyards and can also be used for bracelets and other DIY accessories.
For both methods, you’ll also need a lanyard clasp or swivel hook. Look for one that opens at least ¾ inch wide to fit your material. Breakaway latches are ideal for added safety and flexibility.
With all that together, you can focus on the tools you’ll need to bring your paracord lanyard design to life. As far as equipment goes for lanyard making, you’ll require:
- A needle or sewing machine – Thread won’t get very far without its pointy partner! Pick an appropriately sized needle that will be able to poke through the fabric and batting—or use a sewing machine if you have one available. If you aren’t planning to sew, however, neither needle nor sewing machine will be needed.
- Scissors – Fabrics shears preferably, though a set from the kitchen will do in a pinch.
- An iron – The same one you use for your clothes should do the trick.
- Clips – Pins or other fasteners that can hold the fabric in place as you sew also work well.
Choosing Lanyard Patterns and Designs
The fabric and threading of your lanyard are easily the most important elements of your design as they’ll decide the color scheme and pattern of your project. Thus, it’s important to pick a fabric that you enjoy aesthetically and feels soft when you brush up against it.
Picking a fabric that holds a deep personal significance can also give your lanyard a strong sentimental touch. To pick a fabric with meaning, consider choosing:
- An old piece of clothing that’s worn out, but you’re still emotionally attached to
- A color or pattern that has meaningful cultural significance
- An unused blanket, towel or cloth that can be recycled into a product with purpose
Whatever cut of cloth you choose, be sure to pick a thread that goes smoothly with it if you plan on sewing your lanyard together. Whether cohesive, contrasting or complementary, choose a thread that reflects your personal style and aesthetics.
Bringing Your Lanyard Together
Now that you’ve chosen your materials and assembled your tools, it’s time to commence the crafting. Regardless of if you’re planning to sew or not, the first step is to iron the wrinkles and folds out of your piece of fabric.
Once your cloth is smooth and crease-free, you can choose one of two ways for how to make lanyards:
The Tying Method
This method is quicker and easier than sewing, though the results might not look quite as clean or be equally as comfortable. Still, if you go this route, you don’t have to worry about batting, thread or needles. To begin:
- Roll your piece of fabric so that it’s about an inch wide and resembles a piece of rope. The tying method allows you to substitute your fabric for actual rope—so if you so desire, now’s the time to do it.
- Slide the clasp onto your fabric until it’s precisely in the middle of the two ends.
- Tightly tie the clasp into position using the knot of your choice, then tie the two loose ends together to complete the lanyard.
Mastering Lanyard Knots and Techniques
Want to level up your lanyard game? Mastering a few knot styles can help you secure your clasp and give your project a polished finish—just like a real engineer! While any strong knot will do the trick, one popular choice for lanyards is the diamond knot (sometimes called a lanyard knot). It’s perfect for anchoring your clasp and adding a bit of flair.
Here’s how to try it out:
- Center the clasp on your fabric or cord.
- Make a loop near the clasp and wrap one end of the cord around it.
- Thread one end of the cord through the loop you just created.
- Now take that same end and pull it through the original loop from step 1.
- Repeat with the other end of the cord.
- Finally, pull on both ends to tighten everything into a tidy, secure knot.
Not quite your style? No worries! Campers often experiment with other options like the half-hitch or bowline knot to see what works best. The fun is in trying different techniques and seeing how each one changes the feel and function of your lanyard.
At Camp Galileo, we call this kind of experimentation a design challenge—a chance to test, tweak, and discover. Whether your knot is classic or creative, it’s all about making something that works for you. Grab your materials, try a few twists and turns, and see what kind of clasp magic you can make right away!
The Sewing Method
Sewing your lanyard is a bit more involved but will yield cleaner-looking results and a more comfortable wear. To get started on this method:
- Lay your fabric out flat.
- Measure three-quarters of an inch in from one side and fold it the entire length of the piece.
- Iron a sharp crease along the line you’ve just folded.
- Repeat the measuring, folding and ironing on the other side.
- Slide your piece of batting up the middle of the envelope-like valley you’ve just created.
- Pin your fabric in place and sew along the seam, paying special attention to making tight, strong loops with your thread.
- Once the batting is in place, slide the clasp onto the center of your burgeoning lanyard.
- Pinch the fabric around the bar of the clasp and sew it tightly into place.
- Align the two loose ends of your lanyard and sew them together to complete your project.
The padded, smooth surface of this craft will sit comfortably on your neck or wrist and look stylish while doing so. If you want to amp the aesthetics up even further, however, there are a few adornments you can attach to your lanyard.
Decorating and Adorning Your Lanyard
A fantastic fabric and terrific threading are all a lanyard needs to be lavish and beautiful. However, if you want to dress your project up a little, there are a number of ways to embellish your lanyard and make it your own. To give it a personal touch, consider adding on:
- Pins
- Clips
- Rhinestones
- Glitter
- Iron-on patches
- Patterned felt strips
You can also weave additional lace into the design for a trendy look. There’s a world of possibilities when it comes to decorating your lanyard. Although, keep in mind that additional adornments could end up making it harder to clean and maintain.
Maintaining Your Lanyard
Unlike most clothing, lanyards don’t need to be washed every time you use them. After a while, however, sweat and dirt may build up on them and require some cleaning and care.
If you don’t have any attachments or embellishments on your lanyard, you can just throw it in with a load of laundry. Clips and pins can be pulled before washing, but other adhered adornments such as glitter and rhinestones may come off in your machine. For such customized crafts, lightly handwashing with a bit of soap is the best way to get rid of gunk and grime.
How Lanyard Crafting Builds Design Thinking and STEM Skills
Creating a lanyard is more than a fun make-and-take activity—it mirrors the way engineers and inventors solve real-world problems. As students choose materials, measure precise lengths and decide between the tying or sewing method, they naturally cycle through the stages of design thinking: brainstorming, prototyping, testing and improving. Each step prompts kids to reflect on cause-and-effect concepts, encouraging flexible, solution-oriented mindsets that echo Camp Galileo’s Innovator’s Studio challenges.
- Empathize and Plan – Selecting fabric that feels comfortable on the neck or wrist teaches kids to consider user needs, a core principle of human-centered design.
- Prototype and Test – Knotting or sewing the lanyard lets learners experiment with tension, durability and simple force dynamics, then adjust until the finished piece works perfectly.
- Measure and Calculate – Marking three-inch widths and forty-inch lengths reinforces unit conversion and proportional reasoning—essential math skills disguised as hands-on fun.
- Iterate and Personalize – Adding color swaps or pattern twists invites creativity and shows how small changes can dramatically affect final results, a lesson that translates to larger STEM projects.
By the time the clasp clicks into place, kids have practiced the same mindset Camp Galileo nurtures in projects like bamboo towers or cardboard cities. The takeaway is clear: when young makers apply design thinking to everyday objects, they build confidence and a lifelong love for exploration—one lanyard at a time.
Lanyards Are Just the Beginning When It Comes To Crafting at Camp Galileo
Lanyards are a fun and fascinating craft for kids and parents alike. They are, however, but one of many exciting projects awaiting campers during an unforgettable summer at Camp Galileo.
Through creative, collaborative play and STEAM exploration, our campers will take on new challenges each week—including building mechanical dinosaurs, catapults and remote controlled robots. Then, they’ll take the skills they learn and the confidence, resilience and critical thinking capabilities they foster and apply them toward making the world a better place.
For a traditional summer camp experience that champions fun and personal growth, enroll your kids in Camp Galileo. Explore our locations across California, Chicagoland, Seattle, and Colorado! Located in Southern California? Be sure to check out our Newport Beach summer camp or find the location nearest you with our Camp Finder.

Sources:
Museum of Fine Arts Boston. Batting. https://cameo.mfa.org/
Lo and Behold Stitchery. How to Make a Lanyard. https://www.loandbeholdstitchery.com/blogs/lo-and-behold/how-to-make-a-lanyard
Translational Research in Anatomy. Conference lanyards; why does it take so long to provide health hazard free options?. https://www.sciencedirect.com/
101 Knots. Diamond (Lanyard) Knot. https://www.101knots.com/