Even when summer camp comes to an end, Camp Galileo’s mission remains the same: Empowering kids to explore, build and create all year long. Between camp sessions, we offer numerous resources to families looking to encourage innovation, friendship and fun at home—like this guide.
After school, on the weekends and during school holidays, families can stay engaged Galileo-style with hands-on, screen-free activities for kids designed to spark creativity. The 25 activities below are simple and low-lift. In most cases, they won’t even require a trip to the store.
Looking to nurture your child’s innovative spirit during the school year and beyond? The activities below offer the perfect springboard.
How to Use This Playbook
This guide features 25 hands-on, screen-free activities for kids that are:
- Time-flexible – Some of the activities on this list could take as little as 15 minutes to complete; others could inspire an entire weekend of creative play.
- Resource-efficient – Most of the ideas below only require common household items, like paper, pencils, cardboard and staple kitchen ingredients.
- Age-adaptable – While this guide is designed for kids aged 5–12, the activities are flexible enough to accommodate older and younger family members, too.
We’ve organized the activities into five themes:
- Invent It – Tasks that inspire kids to think like a designer.
- Experiment It – Activities that bring out each kid’s inner scientist.
- Build It – Ideas that foster engineering thinking.
- Imagine It – Prompts that encourage artistic expression.
- Explore It – Ways to create adventure right in your home.
At the end of the guide, you’ll also find a printable tracker sheet. Your kids can use it to keep track of activities and pick out their favorite prompts.
Theme 1: Invent It
The “Invent It” activities below inspire kids to think like designers, through resourcefulness and imaginative problem-solving.
Start here if your kids love to imagine new worlds, come up with zany solutions to common problems or create something new out of unexpected things.
Design a New Toy
Spark creativity with one simple question: “What does your dream toy look like?”
Whether your child gravitates toward race cars, dolls or model-building sets, brainstorming their perfect toy encourages self-discovery and design skills. And you only need a few basic supplies to get started:
- Paper
- Crayons, colored pencils or markers
- A ruler or straight-edge (for detail-oriented creators)
With just a few simple items and an open-ended prompt, kids can dive headfirst into this fun-forward design challenge.
Invent a “Helper Bot”
Design and problem-solving go hand-in-hand, and families can encourage both with another personalized innovation challenge: inventing a “helper bot.”
To get their creative juices flowing, ask kids guiding questions like:
- “If you had a helper bot, what would you ask it to do?”
- “How big would your helper bot be?”
- “How would you ask a robot for help?”
Like the task above, all you need are basic drawing tools and a few inspiring questions to ignite your child’s inventor spirit.
Create a New Ice Cream Flavor and Package
For kids with culinary inclinations, encourage creativity with a sweet challenge: creating a brand-new ice cream flavor in a one-of-a-kind package.
This activity opens up a world of possibilities. Families can:
- Keep it brief – With some basic art supplies and a little brainstorming, kids can spend an hour or less working on a never-before-seen flavor.
- Expand the engagement – Incorporate imaginative play with another challenge: Ask your child how they would pitch their new recipe to a local ice cream shop..
- Kickstart a culinary adventure – Looking for a multiple-hour activity? Help your child bring their creation to life in the kitchen. (Of course, this might require a trip to the grocery store.)
Make a Time Travel Passport
If you could travel through time, how would you keep track of where (and when) you’ve been? With a time travel passport, of course!
This prompt combines practical design skills (like booklet-making) with a few whimsical what-ifs for the ultimate creative challenge. You can help your child brainstorm their passport design with a few questions:
- “What would you want to see if you could time travel?”
- “Would you go to the past, the future or both?”
- “Who checks your passport before you travel through time?”
Like many of the other activities on this list, the materials list is short and sweet: drawing supplies, paper and a few simple binding tools (e.g., a stapler, tape or yarn).
Reimagine a Household Object
How do kids learn design thinking? By using their imaginations to solve real-world problems.
For a quick design challenge, ask your child to reimagine a household object: the toaster, the sofa, the TV remote or any other item they see or use on an average day. Ask questions like:
- “How would you make [item] better?”
- “What do you wish [item] could do?”
- “What would it look like if you made [item] yourself?”
Families can either offer kids tools for hands-on design (like art supplies) or simply start a creative dialogue to encourage verbal brainstorming.
Theme 2: Experiment It
Looking to nurture your child’s inner scientist? You don’t need a high-tech lab or fancy supplies.
The activities below are designed to encourage curiosity and introduce scientific concepts. Each prompt gives kids opportunities to ask questions, make predictions and explore how the world works—all while having fun at home.
Balloon-Powered Car
Introduce Newton’s laws of motion (and a few engineering skills) with a science-forward design challenge: making a balloon-powered model car.
While there are a few different ways to create movable mini cars out of household items, the following materials offer a strong starting point:
- An empty plastic bottle
- Four plastic bottle caps
- A few straws and skewers
- A balloon
- Tape
- Scissors
- Rubber bands
The balloon-powered car project puts basic mechanical skills to the test, introduces physics concepts and encourages troubleshooting—all hallmarks of a fun science experiment.
DIY Volcano
The home volcano is a classic. If you’ve never made one before, don’t worry—the process is simple and fun. Here’s what you’ll need:
- A piece of cardboard
- Scissors
- Tape
- Modeling clay
- Paint
- Baking soda
- Vinegar
- Water
- Dish soap
- Two small plastic cups
Build the volcano by bending a piece of cardboard into a cone. Make sure to leave a hole at the top. If desired, you can cover the cardboard with modeling clay, let the clay air dry and paint it to create a more realistic (or artistic) model.
Place a small cup of baking soda inside the cardboard volcano. In a separate cup, combine vinegar with a few drops of water and dish soap. When you’re ready, pour the vinegar mixture through the top of the cone to trigger a mini eruption: Foam will quickly form and pour out of the top of the volcano.
Combining chemistry and creativity, the DIY volcano is always a hit with young scientists in the making.
Make Slime with Kitchen Ingredients
Slime is a sensory-stimulating scientific marvel—and it’s easy to make at home! Just combine:
- 2 tablespoons of cornstarch
- 1 ½ tablespoons of dish soap
- A few drops of food coloring (if desired)
Mix the ingredients with your hands to form non-stick, stretchy slime—a non-Newtonian fluid that seems to defy physics before your eyes.
Water Walking Rainbow
With the water walking rainbow experiment, kids can see capillary action in real time. To get started, you’ll need:
- Seven small (ideally clear) water glasses
- Water
- Red, blue and yellow food coloring
- Paper towels
Setting up the experiment is simple:
- Place all seven glasses in a straight line; the sides should be touching.
- Fill the first, third, fifth and seventh glasses with water all the way to the top.
- Add ten drops of red food coloring to the first and seventh glasses.
- Add ten drops of yellow food coloring to the third glass.
- Add ten drops of blue food coloring to the fifth glass.
- Fold a paper towel to create a small, flexible roll. Create six rolls total.
- Fold each roll in half and use them to “bridge” the glasses together.
As water moves up each paper towel via capillary action, the empty glasses will begin to fill with water. Plus, the food coloring creates a vivid rainbow effect as the colors blend—the perfect way to introduce capillary action visually.
Invisible Ink Messages
With a few supplies and a simple chemical reaction, your kids can send messages in invisible ink. You’ll need:
- Baking soda
- Water
- A small cup
- A paintbrush
- Paper
- Dark fruit juice (e.g., grape or cranberry juice)
In one cup, combine equal parts baking soda and water; this is the invisible ink. Using the paintbrush, write a message on a piece of paper. Let the ink dry completely.
To reveal the message, use a paintbrush (or, alternatively, a kitchen sponge) to dab juice onto the paper. When the acid in the juice reacts with the baking soda, the ink becomes visible, revealing the message.
While the invisible ink trick is sure to spark scientific curiosity, it has creative potential, too. This is a great opportunity to encourage artistic innovation.
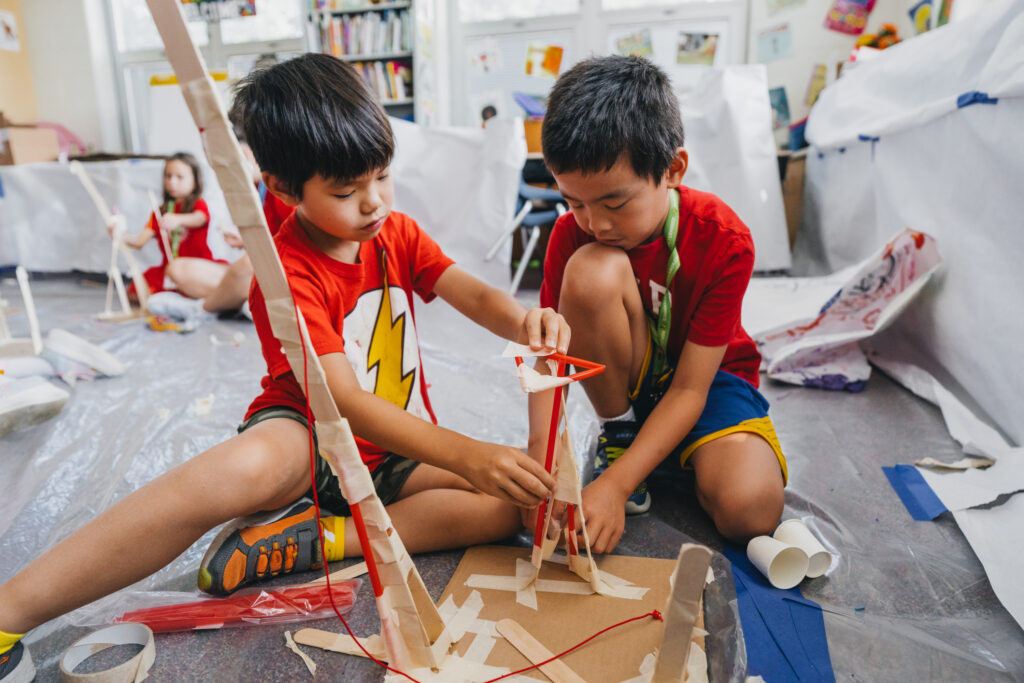
Theme 3: Build It
The activities below combine the best of engineering, construction, creativity and friendly competition. With persistence (and, sometimes, lots of duct tape), kids can use basic materials to build impressive structures.
These hands-on projects foster kids’ spatial thinking, creativity and resilience—and there’s nothing quite like building something with your own two hands.
Paper Bridge Challenge
Whether you stage a competition or encourage collaboration, the paper bridge challenge offers a beginning engineering lesson and a fun activity for kids. You’ll need:
- A few sheets of paper
- Two equally sized books (or small boxes)
- Tape
- Pennies (or other small, weighty objects)
Place the books (or boxes) about 10 inches apart. Using pieces of paper, create a bridge to connect the two books; you can test the strength of your bridge with pennies.
While a single sheet of paper won’t hold many pennies, various folding methods, tape and multiple sheets of paper can create stronger, more resilient structures. This is where creativity meets engineering!
Build a Cardboard Fort
For a less competitive engineering activity, prompt kids to create a fort out of cardboard. In addition to empty cardboard boxes, the following materials can provide more structural support or decorative flair:
- Scissors
- Duct tape
- Empty wrapping paper or paper towel tubes
- Markers, crayons or colored pencils
If you don’t have a stockpile of empty cardboard boxes, kids can supplement their structures with bedsheets or other lightweight materials. After construction is complete, ask the designers to provide a tour of their fortress.
Marshmallow Tower
Looking for a smaller-scale engineering challenge? The marshmallow tower fits the bill. Start by gathering supplies:
- Marshmallows – Marshmallows can be any size or shape. If you don’t have any, you can use other squishy foods (like gummy bears or fruit snacks) or modeling clay.
- Spaghetti – While raw spaghetti noodles are commonly used to build marshmallow towers, kids can use long wood skewers or toothpicks instead.
By connecting marshmallows with spaghetti noodles, kids can create tall, complex structures. The catch? Marshmallows and raw noodles are delicate—remind kids that it can take time to get a feel for the materials.
Design a Paper Roller Coaster
With a few templates printed on cardstock, kids can build their own modular roller coasters—and test their creations with marbles.
In addition to sturdy paper and a few marbles, you’ll need:
- Scissors
- Tape
- Cardboard, paper towel rolls or other recyclables
Many paper roller coasters are made from folded cardstock strips and tape. However, encourage kids to experiment with other recyclables to create unique and functional marble tracks. Kids can make roller coasters individually or with a co-engineer collaborator.
Create a Domino Chain Reaction
Domino chains offer a world of creative potential. And, in their simplest form, they don’t require additional materials.
However, kids can build more complex or eye-catching chains with a few extra items like:
- Toothpicks
- Playing cards
- Small wooden dowels (or pencils)
- Wooden blocks
- Marbles
- Coins
For an engineering double-header, combine this challenge with the paper roller coaster activity to create a multi-stage chain reaction.
Theme 4: Imagine It
While all of the themes above encourage creativity, this section is dedicated to artistic activities: tasks that foster expressive, dramatic thinking.
Imagination fuels creativity in every form. With the activities below, kids can bring their ideas to life in more than one medium.
Write and Perform a Short Play
Writing and performing a short play or skit can spark creativity in numerous ways: Storytelling, acting and even building small sets all pose fun challenges.
While kids can create their own dramatic works with nothing more than pencils and paper, you can also encourage them to enhance their productions with:
- Musical instruments
- Props and backdrops
- Costumes
- A makeshift stage with a curtain
Even if you challenge kids to write a play without using digital devices, consider using your smartphone to record the performance.
Make a Comic Strip
Writing and performing a play could be an all-day activity; making a comic strip is a shorter-term alternative. Kids will need:
- Paper
- A ruler or straightedge
- Colored pencils, crayons or markers
- Reference photos
Since newspaper comics aren’t as common as they used to be, younger kids may need to see a few references to get inspired. Consider using an internet search to find classic comic strips or checking out a kids’ graphic novel at your local library.
Create a Monster and Its Habitat
Creating an imaginary monster and its habitat is a very versatile activity:
- It’s scalable – From shoebox diorama-style creations to large-scale forts, monsters and habitats can come in all shapes and sizes.
- Multiple materials can work – Fabric scraps, recyclables, bedsheets, laundry baskets—kids can use just about anything to construct a creature.
- It can be long- or short-term – If you’re looking for a 15-minute activity, this could be a simple art project on paper. Alternatively, this could be a multiple-hour challenge.
After their creations are complete, ask kids about their monsters and habitats to incorporate storytelling skills.
Design a Costume from Recyclables
While this activity could work in tandem with a play performance, making a costume out of recycled materials can also be a standalone project. The opportunities are endless when it comes to materials, but it might be easiest for kids to work with:
- Cardboard scraps
- Butcher paper (or paper grocery bags)
- Twist ties
- Clothespins
- Tape
- Scissors
Why use recyclables? You’ll keep waste to a minimum and encourage resourcefulness—two skills that lie at the heart of creativity.
Paint with Nature
Looking to spend some time outdoors? Many natural materials can be used as art supplies:
- With paper and a crayon, kids can create rubbings of natural surfaces, leaves and items found in nature.
- Acorn tops, nutshells, sticks and shed tree bark can all be used to create 3D sculptures.
- Mud, clay and moss can all serve as paint alternatives.
Depending on their chosen medium, kids may need additional supplies to paint with nature, like cardboard, glue or colored pencils.
Theme 5: Explore It
The ideas below are designed to make even the most familiar environments seem like discovery zones and bring out your kid’s inner adventurer.
Blindfolded Kitchen Ingredient Taste Test
Introduce kids to new ingredients (and test their taste buds) with a blindfolded taste test. Start the activity with familiar ingredients like:
- Salt
- Lemon
- Milk
- Chocolate
For young taste test pros, kick it up a notch with more niche ingredients like:
- Fresh herbs
- Fruit preserves
- Spices
- Nuts and seeds
If you’re feeling courageous, let the kids administer a blindfolded taste test for you—but hide the hot sauce first!
Backyard (or Indoor) Scavenger Hunt
Scavenger hunts encourage observation, exploration and play: They teach kids to pay close attention to their surroundings, even if they’re familiar.
Whether you create a scavenger hunt in your backyard or indoors, the process is simple:
- Create a “trail” of objects leading to a prize.
- For each item on the trail, create a clue that will lead kids to the next one.
- The last clue should lead to the prize.
You can use just about anything as a scavenger hunt prize: Stickers, candy and trinkets all fit the bill. While kids can complete scavenger hunts on their own, we encourage adults to join in on the adventure and get a taste of exploration.
Neighborhood Mapping with Chalk
Map-making combines artistry, spatial awareness and memory. Making a map of your neighborhood with sidewalk chalk is an excellent way to build all of these skills.
All you’ll need is a box of sidewalk chalk and an open, paved area to serve as a canvas. To start building the map, prompt kids to draw familiar places like:
- Home
- School
- A local park
- The grocery store
- Nearby friends’ houses
- Neighborhood landmarks (like sculptures or signs)
After adding the first few locations, kids can start connecting them with roads. For older kids, you can add an extra challenge by incorporating cardinal directions.
DIY Compass
If your kids are ready to add cardinal directions to their neighborhood chalk maps, they’ll need a compass—and they can make their own.
To make a DIY compass, you need:
- A sewing needle
- A refrigerator magnet
- A small foam cube (about one inch on all sides)
- Scissors
- A bowl of water
Carefully lay the needle flat against the magnet, then rub the needle against the magnet in the same direction approximately 20 times. This will make the needle magnetic.
Use the needle to pierce the foam cube and float it in the bowl of water on a flat surface. Once it settles, the needle should point north (you can use your smartphone’s compass to confirm).
Making a DIY compass is fun and informative for young explorers learning to navigate their world
Make a Nature Journal
A nature or discovery journal can provide a place for kids to document all of their explorations, look back on what they’ve learned and showcase their creativity. You can either:
- Make a DIY journal – Kids can create small booklets using a few sheets of paper and a binding method (e.g., staples or yarn).
- Purchase a journal – Standard notebooks provide a ready-made option.
Encourage kids to create entries in their journal whenever they make a discovery—learning to identify a native tree or finding a unique leaf, for example.
With a log of their discoveries, kids can reflect on what they’ve learned during their recent explorations and even brainstorm nature-inspired creative works!
Keep the Creativity Going with Camp Galileo
While summer is our favorite season at Galileo, creativity doesn’t have to stop on the last day of camp. We’re here to support imagination and innovation all year long.
Want to learn more about fostering creativity at home? Check out our Resources Center for Galileo insights, tips, DIY projects and more.
You can also learn more about Camp Galileo summer programs to start planning for next year’s summer break!
Printable Tracker Page
Name: ______________
You can use this tracker to:
- Check off completed activities
- Add stickers or badges
- Choose your favorite activity from each category
For a fun challenge, try to complete at least one activity in each category!
| Invent It | Experiment It | Build It | Imagine It | Explore It |
| Design a New Toy
[Sticker Space]
|
Balloon-
Powered Car
[Sticker Space]
|
Paper Bridge Challenge
[Sticker Space]
|
Write and Perform a Short Play
[Sticker Space]
|
Backyard (or Indoor) Scavenger Hunt
[Sticker Space]
|
| Invent a “Helper Bot”
[Sticker Space]
|
DIY Volcano
[Sticker Space]
|
Build a Cardboard Fort
[Sticker Space]
|
Make a Comic Strip
[Sticker Space]
|
Neighborhood Mapping with Chalk
[Sticker Space]
|
| Create a New Ice Cream Flavor and Package
[Sticker Space]
|
Make Slime with Kitchen Ingredients
[Sticker Space]
|
Marshmallow Tower
[Sticker Space]
|
Create a Monster and Its Habitat
[Sticker Space]
|
Make a Nature Journal
[Sticker Space]
|
| Make a Time Travel Passport
[Sticker Space]
|
Water Walking Rainbow
[Sticker Space]
|
Design a Paper Roller Coaster
[Sticker Space]
|
Design a Costume from Recyclables
[Sticker Space]
|
DIY Compass
[Sticker Space]
|
| Reimagine a
Household Object
[Sticker Space]
|
Invisible Ink Messages
[Sticker Space]
|
Create a Domino Chain Reaction
[Sticker Space]
|
Paint with Nature
[Sticker Space]
|
Blindfolded Kitchen Ingredient Taste Test
[Sticker Space]
|
| My Favorite Invent It Activity:
|
My Favorite Experiment It Activity:
|
My Favorite Build It Activity:
|
My Favorite Imagine It Activity:
|
My Favorite Explore It Activity:
|
Sources:
Child Aware of Kansas. Design Thinking for and with Children. https://ks.childcareaware.org/design-thinking/
Science Buddies. Build a Balloon Car. https://www.sciencebuddies.org/stem-activities/balloon-car
Arm and Hammer. 7 DIY Projects Your Kids Will Love. https://www.armandhammer.com/articles/7-diy-projects-for-kids
Glazer Children’s Museum. Non-Stick Slime with Only Two Ingredients. https://glazermuseum.org/nonstickslime
Crash Course Kids. Oobleck and Non-Newtonian Fluids. https://www.youtube.com/watch?v=Fnd-2jetT1w
Clayton’s Exploration Station. Walking Water Rainbow!. https://www.youtube.com/watch?v=1PWVSt5zYaI
National Geographic. Invisible Ink. https://kids.nationalgeographic.com/explorer-academy/article/invisible-ink
Science Buddies. Build the Best Paper Bridge. https://www.sciencebuddies.org/stem-activities/build-best-bridge
The Branch Museum of Architecture and Design. The Marshmallow Toothpick Engineering Challenge. https://branchmuseum.org/wp-content/uploads/2020/04/Marshmallow-Toothpick-Engineering-Challenge.pdf
Science Buddies. Build a Paper Roller Coaster. https://www.sciencebuddies.org/stem-activities/paper-roller-coaster
Scholastic. Preschool Scavenger Hunts: Learning Through Observation. https://www.scholastic.com/parents/school-success/learning-toolkit-blog/preschool-scavenger-hunts-learning-through-observation.html
American Museum of Natural History. Create a Compass. https://www.amnh.org/explore/ology/earth/create-a-compass2